Synthetic Turf: The Perfect Lawn, with Zero Maintenance
Synthetic Turf
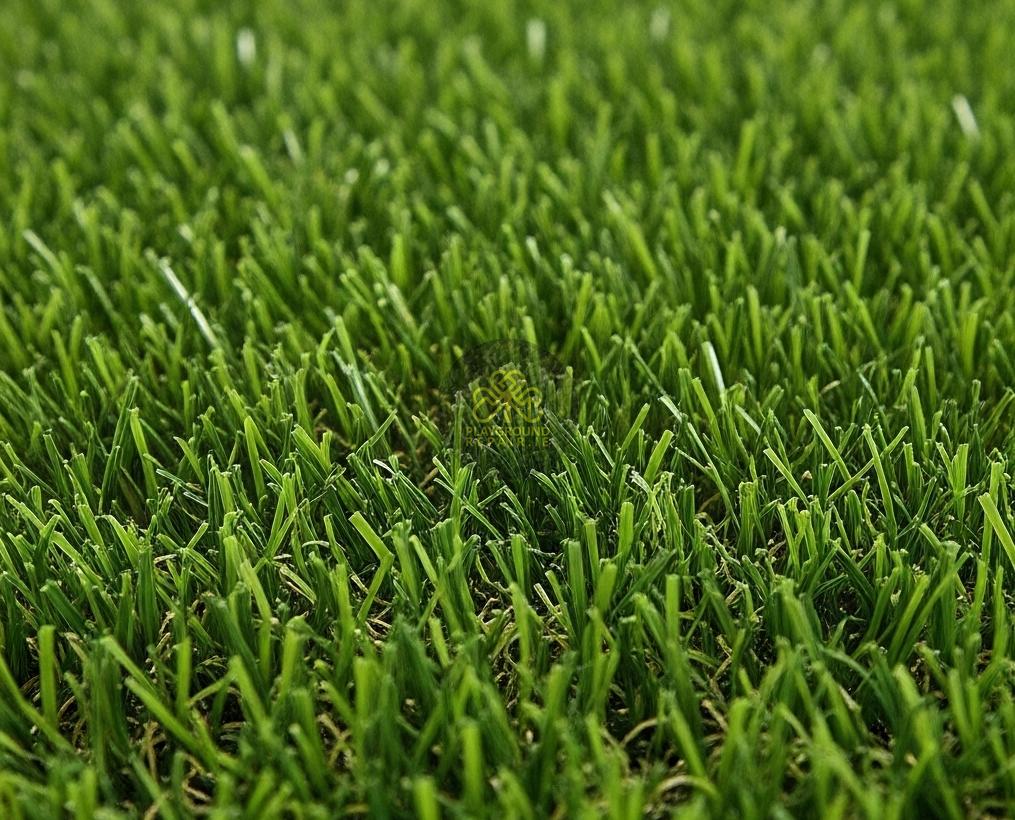
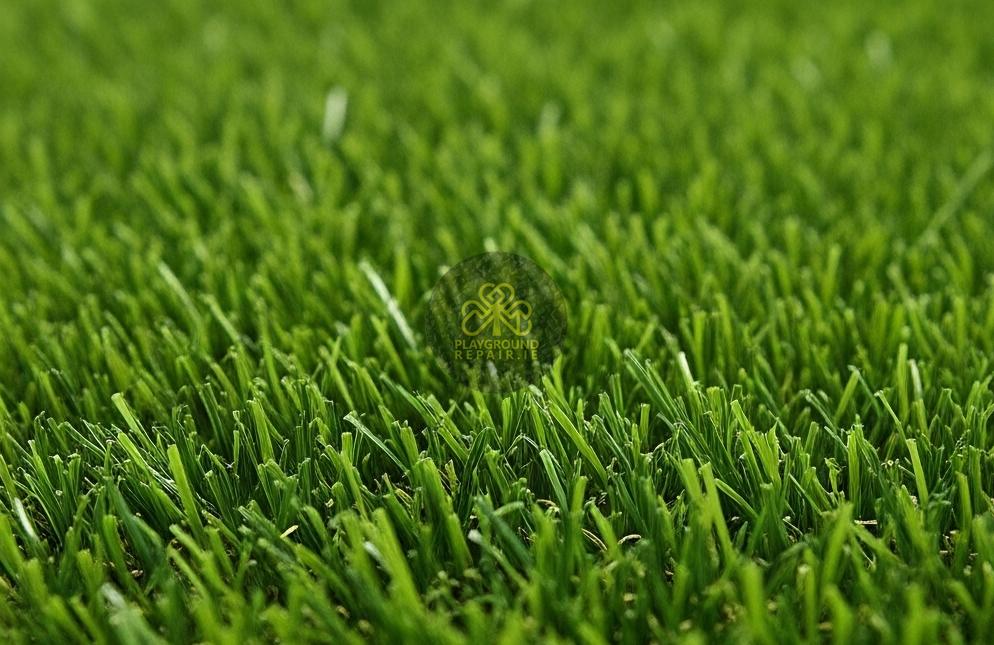
Our synthetic turf delivers a vibrant, maintenance‑free surface that stays lush year‑round. No mowing, watering, or chemicals needed, while offering a soft, durable, and safe play area for kids and pets.
€99.00
Quantity:
Key Benefits
- 🌱 Low Maintenance
- 💧 Water Conservation
- 💪 Durability & Longevity
- ✅ Consistent Aesthetics
- 🌸 Allergy & Pest Reduction
- 🧹 Clean & Safe
- 🌍 Environmental Upside (and some concerns)
Synthetic Turf Tile Calculator
Description
Specifications
Installation Guide
Shipping & Returns
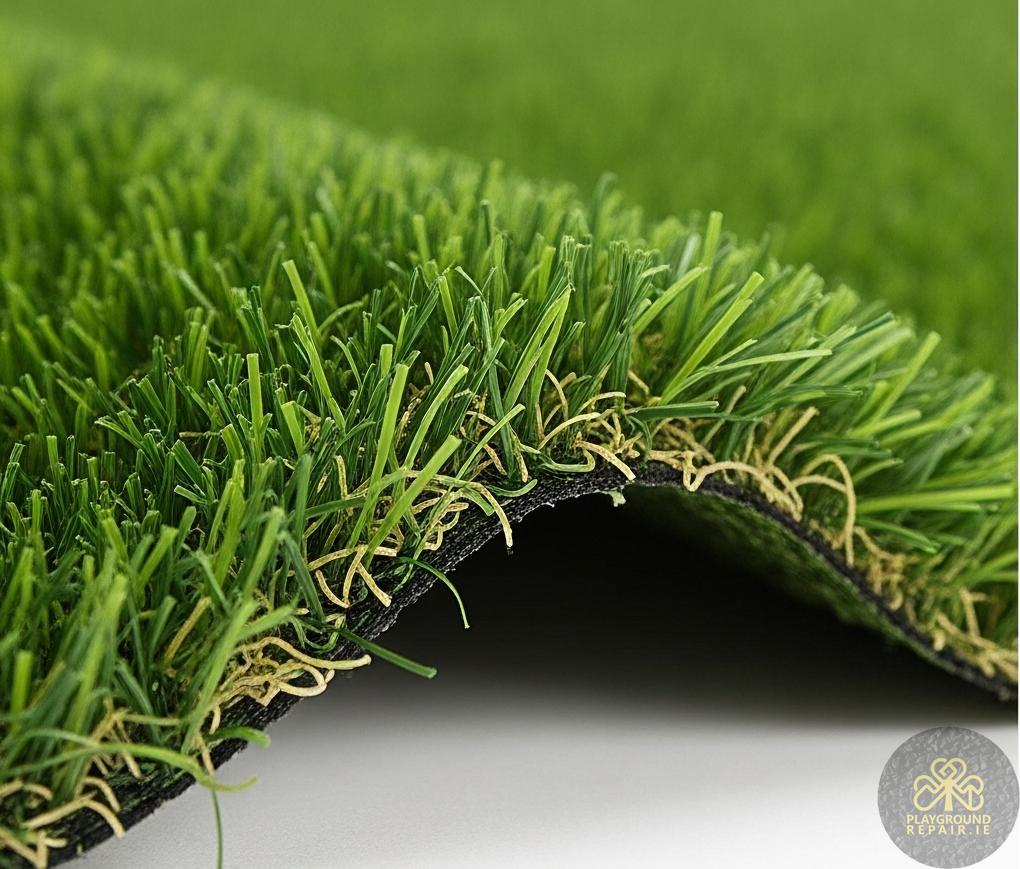
Synthetic Turf is a high-performance solution meticulously crafted by Playground Repair Ltd. Designed to serve both residential and commercial users.
Artificial Grass masterfully combines durable materials with modern aesthetics. As a result, it consistently delivers reliable and impressive results in a wide array of everyday applications.
| Property | Value |
|---|---|
| Material | Polyethylene (PE) with a Polypropylene (PP) thatch layer |
| Pile Height | 30-40 mm |
| Density / Stitch Rate | 16,000 - 20,000 stitches per m² |
| Backing | Double-layered, Polyurethane (PU) coated |
| Drainage Capacity | > 60 litres per minute per m² |
| UV Resistance | Certified to BS EN 14877 standards (Scale > 3) |
| Infill Material | Kiln-Dried Silica Sand |
| Weight | Approx. 2.5 - 3.0 kg per m² |
| Colour | Multi-tone Green with a Brown Thatch |
| Safety Certification | EN 71-3 (Non-Toxic) |
| Warranty | 8-10 Year Limited Warranty |
Installing artificial turf is a rewarding project that can transform your garden. By following these steps carefully, you can achieve a professional, long-lasting result.
Before You Begin: Tools and Materials
Tools:
- Spade or Turf Cutter
- Wheelbarrow
- Tape Measure
- Shovel & Rake
- Spirit Level or Laser Level
- Vibrating Plate Compactor (Wacker Plate) - can be rented
- Craft Knife or Stanley Knife (with extra blades)
- Hammer & Mallet
- Stiff-bristled Power Brush or Yard Brush
Materials:
- Your new Artificial Turf rolls
- Sub-base: 804 hardcore or crushed stone (approx. 50-75mm depth)
- Blinding layer: Grano dust or sharp sand (approx. 20-25mm depth)
- Weed-suppressing membrane
- Ground fixing pins or U-pins (galvanised)
- Joining tape and adhesive (if you have multiple rolls to join)
- Kiln-dried silica sand for infill
Step 1: Ground Preparation & Excavation
The foundation is the most critical part of the installation. A well-prepared base ensures good drainage and a perfectly level lawn for years to come.
- Clear the Area: Remove all existing grass, weeds, rocks, and debris from the designated area. For larger lawns, renting a turf cutter will save significant time and effort.
- Excavate: Dig out the area to a depth of approximately 75-100mm (3-4 inches). This will accommodate the new sub-base and ensure the final turf level sits correctly against patios or pathways.
- Create a Slight Slope: Ensure the excavated area has a very subtle slope (a fall of 1cm for every 1m) directed away from your house. This is crucial for assisting drainage, especially in rainy climates.
- Compact the Soil: Once excavated and levelled, use the plate compactor to compact the soil base. This creates a stable foundation to build upon.
Step 2: Installing the Sub-Base
The sub-base provides the structural integrity and primary drainage for your new lawn.
- Lay the Sub-Base Material: Fill the excavated area with 50-75mm of 804 hardcore or a similar crushed stone aggregate. Spread it evenly across the entire area with a rake and wheelbarrow.
- Compact the Sub-Base: Using the vibrating plate compactor, go over the entire sub-base at least twice. Ensure it is firm and level. Check for any dips and fill them with more aggregate as needed before compacting again.
- Lay the Weed Membrane: Roll out the weed-suppressing membrane over the compacted sub-base. Overlap any joins by at least 150mm (6 inches) and secure the perimeter and seams with ground fixing pins. Trim any excess membrane around the edges.
- Add the Blinding Layer: Apply a 20-25mm layer of grano dust or sharp sand over the weed membrane. This thin layer creates a smooth, firm surface to lay the turf on.
- Final Compaction: Rake the sand level and use the plate compactor one last time to create a perfectly smooth, hard-wearing surface. Lightly spray with water to help the sand bind together.
Step 3: Laying the Artificial Turf
Now for the exciting part—laying the grass.
- Acclimatise the Turf: Unroll your artificial turf and let it rest for a few hours (or overnight if possible) to allow any creases from being rolled up to settle out.
- Position the Turf: Carefully lay the turf over the prepared base. If using multiple pieces, ensure the "pile direction" (the direction the grass blades lean) is facing the same way on all sections for a consistent look. The best view is usually achieved when the pile faces towards the main viewing point (e.g., the house).
- Trim the Edges: Using a sharp craft knife, carefully trim the edges of the turf to fit the shape of your lawn. Cut from the underside of the turf for a cleaner, easier cut. Change blades frequently to maintain sharpness.
- Join the Seams (if applicable):
- Lay the two pieces of turf next to each other, ensuring a gap of about 2-3mm between them.
- Fold back the edges and lay the joining tape (adhesive side up) down the centre of the seam.
- Apply the specialist adhesive to the tape in a zigzag pattern.
- Carefully press the two edges of the turf back down onto the adhesive tape. Ensure no grass blades get stuck in the glue. Weigh the seam down with planks or heavy objects while it cures.
Step 4: Finishing Touches
The final steps secure the turf and give it a professional, natural appearance.
- Secure the Perimeter: Hammer galvanised U-pins or ground fixing pins into the perimeter of the turf every 30-50cm. This prevents the edges from lifting. Use your fingers to fluff the grass blades up around the pinheads to hide them.
- Apply the Infill: Evenly spread the kiln-dried silica sand over the entire lawn. Aim for a coverage of about 5-8kg per square metre.
- Brush the Turf: Using a stiff power brush or a strong yard brush, brush vigorously against the pile direction. This helps the grass blades stand up and works the sand infill down to the base of the turf, adding weight and stability.
- Final Inspection: Walk around the lawn, checking for any loose edges or uneven areas. Brush the entire area one last time for a perfect, uniform finish. Your new lawn is now ready to be enjoyed!
Playground Repair Ltd is committed to a swift and secure delivery process. We dispatch your artificial grass within 48 hours of your order confirmation. To ensure its safe arrival, Playground Repair Ltd partners with insured carriers for all shipments. Upon dispatch, the customer receives an email with tracking information to monitor the delivery status. In the unlikely event that the artificial grass arrives damaged or defective, the customer is entitled to request a full refund within 30 days of receipt.